Landing Zone Accelerator on AWS - Part Two Deployment
Landing Zone Accelerator - Introduction
Welcome back to part two in our series covering the Landing Zone Accelerator on AWS. In this post I’m going to walk you through a successful deployment of the Landing Zone Accelerator on AWS. Due to volume of content that needs to be covered this will now be a three part blog series. In part three we will discuss how to modify the Landing Zone Accelerator to turn on services and implement your Organisations’ cloud policies such as tagging or budget alerts.
Below are a number of prerequisites that must be completed in order before you can deploy the Landing Zone Accelerator on AWS.
Prerequisites Number One - AWS Organizations
AWS Organizations helps you centrally manage and govern your environment as you grow and scale your AWS resources. Log into AWS Management Console and select AWS Organisations.
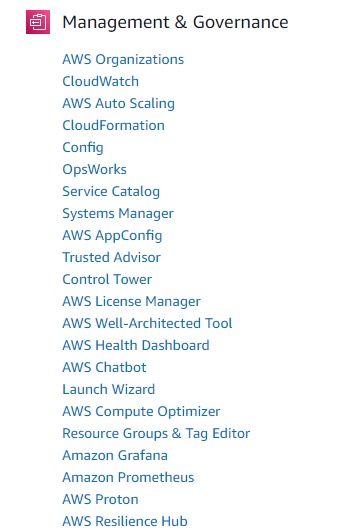
You want to click on Create an organization on the far right of the screen.

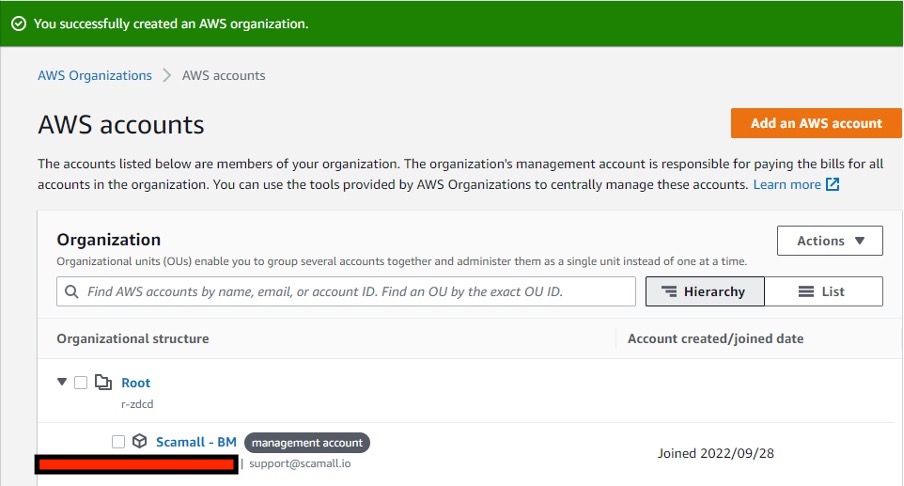
If successful you will see something similar to below and only your management account should appear in the list.
Prerequisites Number Two - AWS Control Tower
AWS Control Tower provides the mechanisms with which can set up and govern a secure, multi-account AWS environment called a landing zone. Go to AWS Management Console and select Control Tower.

Click on Setup Landing Zone. You will need two additional email distribution lists that are not associated to any AWS accounts to proceed.

Review the Control Tower notes and pricing information. Scroll down to select your Home Region and enable the Region Deny Setting.
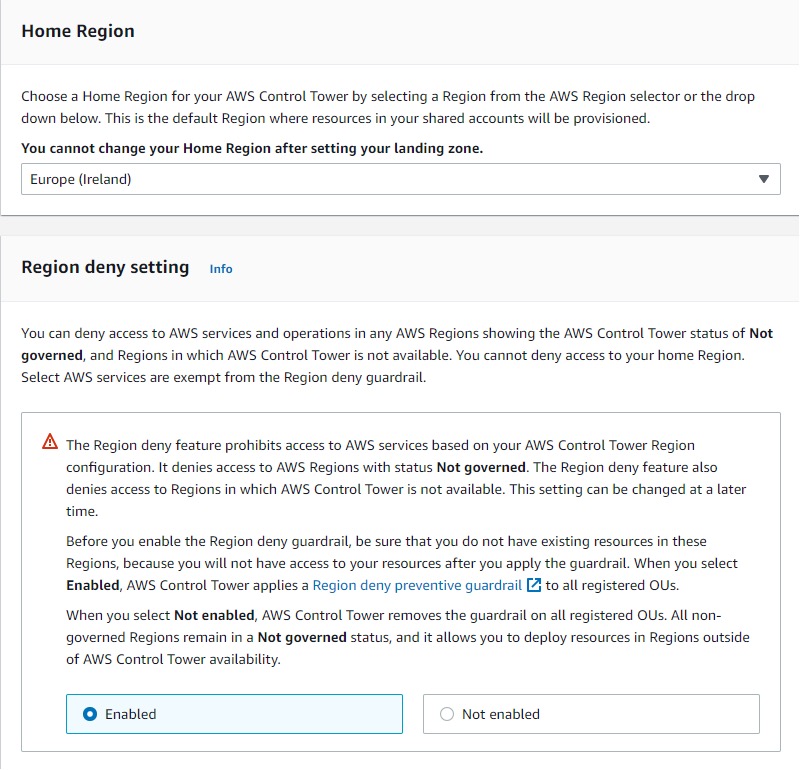
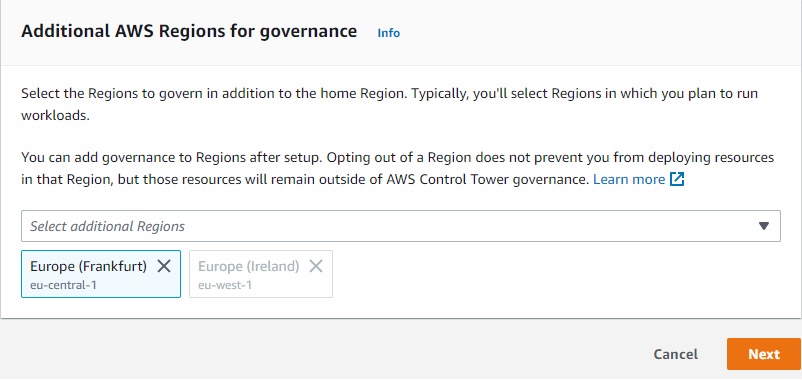
Next select any other regions that you want to apply guardrails to. Continue to Step 2 Create organisational units (OUs).
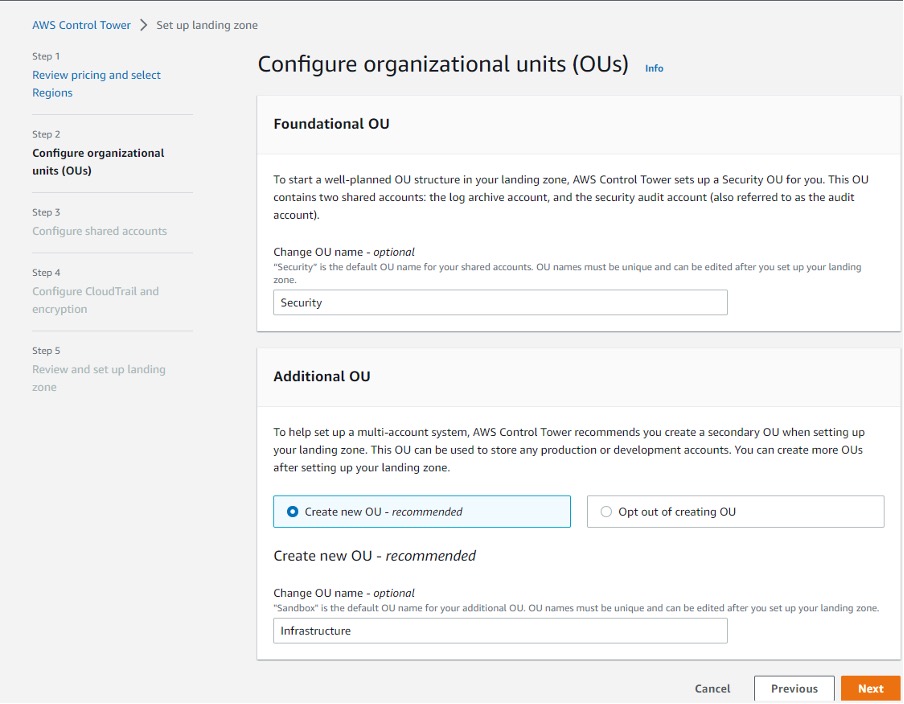
The Landing Zone Accelerator is expecting two OUs Security and Infrastructure.If these OUs don’t exist the CloudFormation deployment will fail. Click on Next to proceed to Step 3.
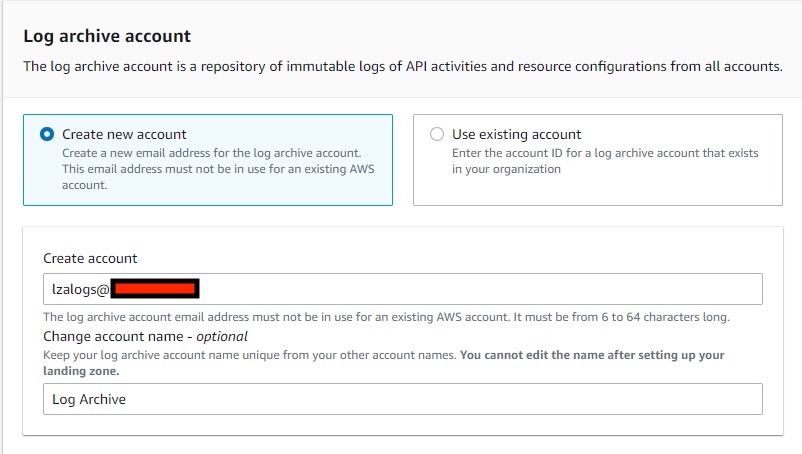
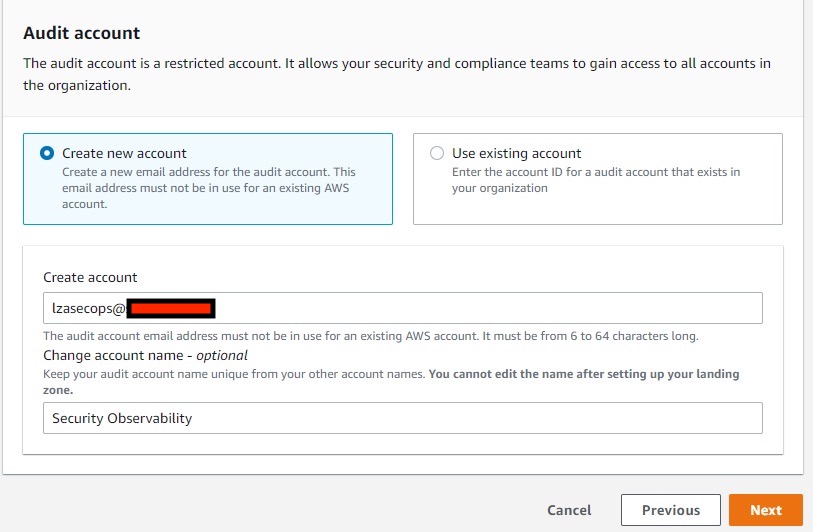
In this step we configure the names of our accounts and add the email distribution lists we are going to use. These are the mandatory accounts that Control Tower creates as part of the process.
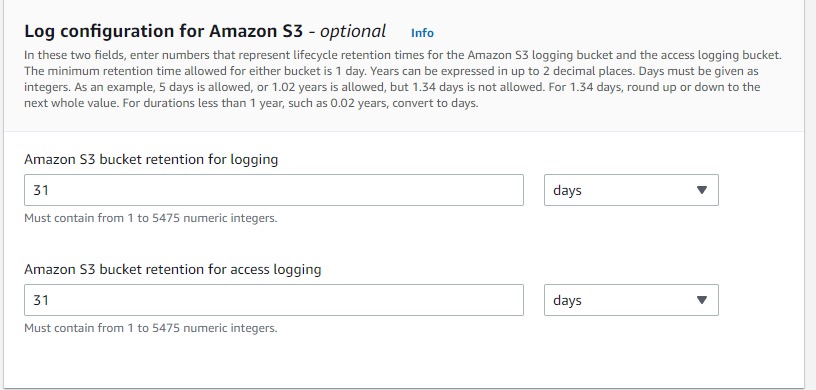
Click on Next to move onto the next step. In this step we will turn on CloudTrail, set retention for CloudWatch Logs and enable KMS encryption.
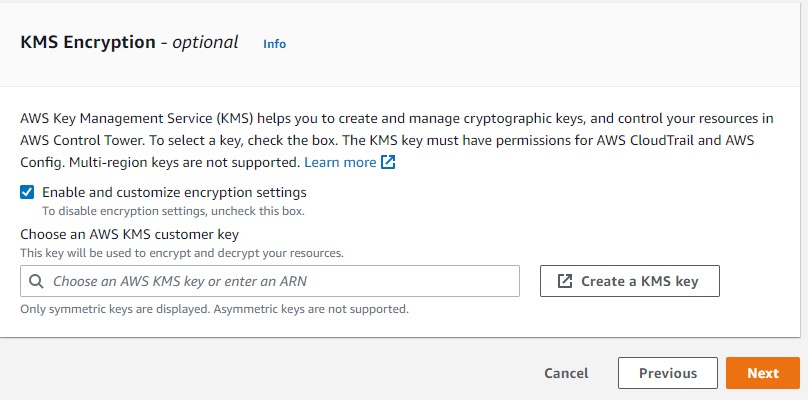
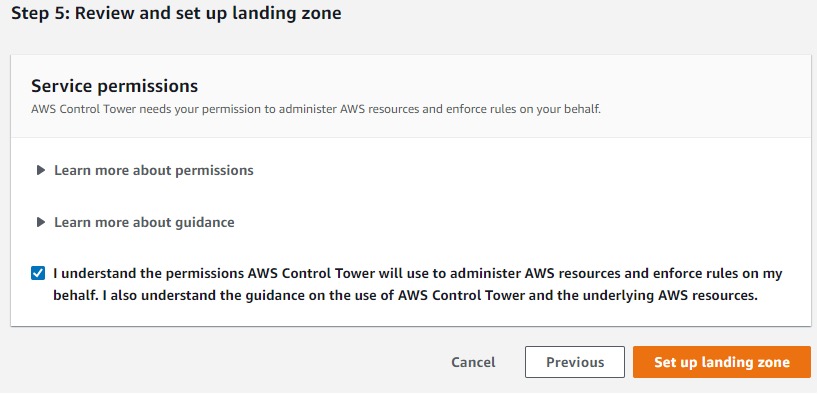
Click on Next to move onto the final step which is the review. Click on Setup Landing Zone to have Control Tower deploy your Landing Zone. At this stage we still have not deployed the Landing Zone Accelerator on AWS. Once Control Tower starts working you will see something similar to below.
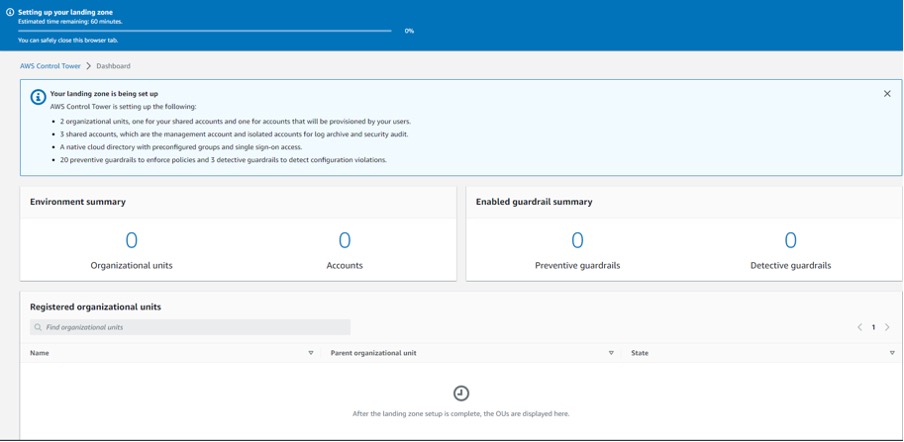
Time to go get a coffee or tea as Control Tower will be busy deploying for approx 30 to 45 minutes depending on your regional selections and encryption. Once Control Tower finishes deploying you will see below message in the Console.

Prerequisites Number Three - GitHub Personal Access Token
You require a GitHub access token to access the Landing Zone Accelerator on AWS code repository. Instructions on how to create a personal access token are located on GitHub Docs
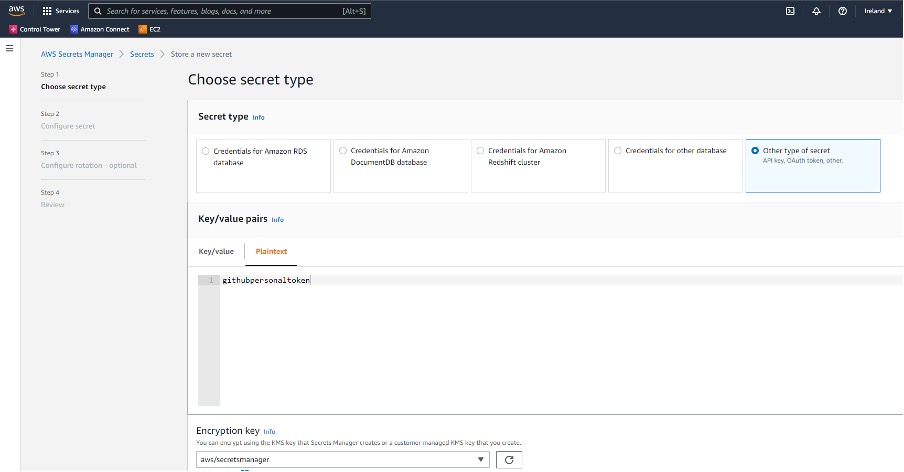
Once you have created the GitHub personal access token it needs to be stored in Secrets Manager as plain text. Use Secrets Manager in your Home Region that you deployed Control Tower in.
- From the AWS Management Console go to Secrets Manager

- Store a new secret, and select Other type of secrets, Plaintext.Paste your secret with no formatting no leading or trailing spaces (completely remove the example text).

-
Select an encryption key.
-
Set the secret name to accelerator/github-token (case sensitive).

-
Select Disable rotation.
Warning Costs
You are responsible for the cost of the AWS services used while running this solution. As of August 2022, the cost for running this solution using the Landing Zone Accelerator on AWS best practices configuration with AWS Control Tower in the US East (N. Virginia) Region within a test environment with no active workloads is approximately $357.87 per month.
| AWS Service | Cost per month |
|---|---|
| AWS CloudTrail | $4.30 |
| Amazon CloudWatch | $8.56 |
| AWS Config | $24.40 |
| Amazon GuardDuty | $4.27 |
| AWS Key Management Service (AWS KMS) | $110.06 |
| Amazon Macie | $5.50 |
| Amazon Route 53 | $2.00 |
| Amazon Simple Storage Service (Amazon S3) | $1.48 |
| Amazon Virtual Private Cloud (Amazon VPC) | $157.94 |
| AWS Security Hub | $38.97 |
| AWS Secrets Manager | $0.39 |
| Amazon Simple Notification Service (Amazon SNS) | $0.21 |
Landing Zone Accelerator on AWS - CloudFormation Deployment
Download the AWS CloudFormation template to your local machine from here.
From within the AWS Management Console go to CloudFormation. N.B Important to use CloudFormation in the region that you deployed Control Tower in otherwise the stack will fail to deploy. When you open CloudFormation you should see two stacks from Control Tower here. Click on Create Stack on far right selecting With new resources (standard).
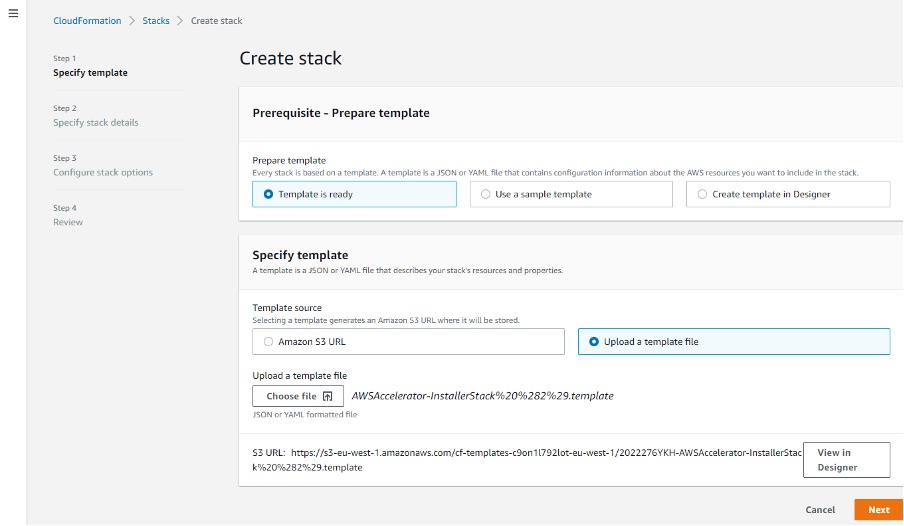
Select Template is ready and Upload a template file. You want to choose the template file that you downloaded above.

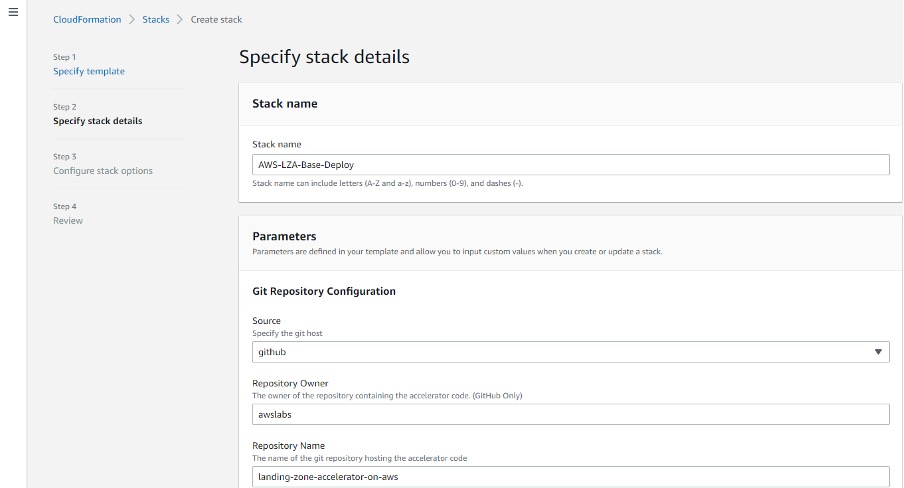
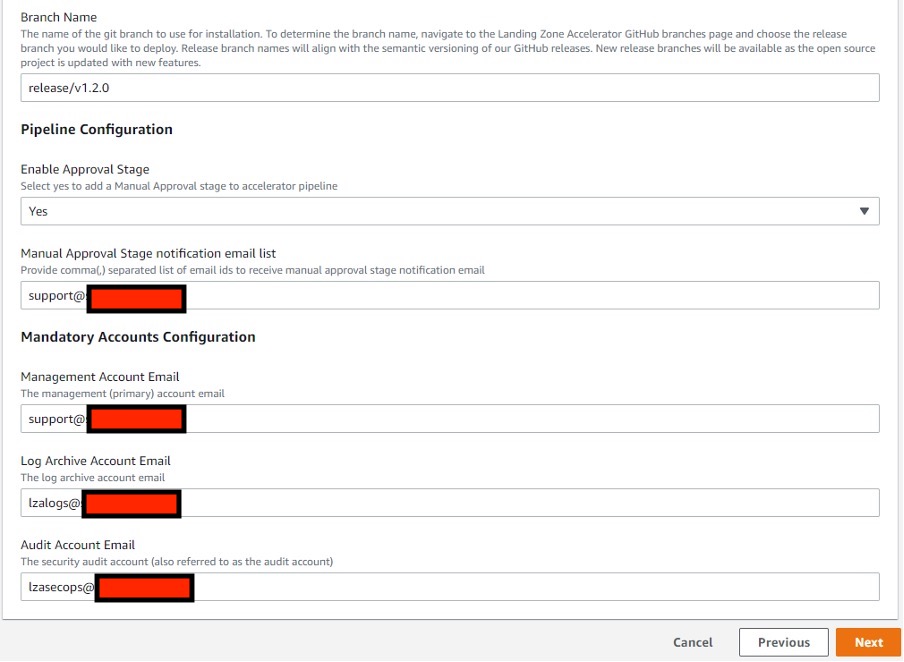
Give your Stack a name and modify the Parameters to match your configuration. Click on Next to Continue.
Configure your stack options
Click next to review
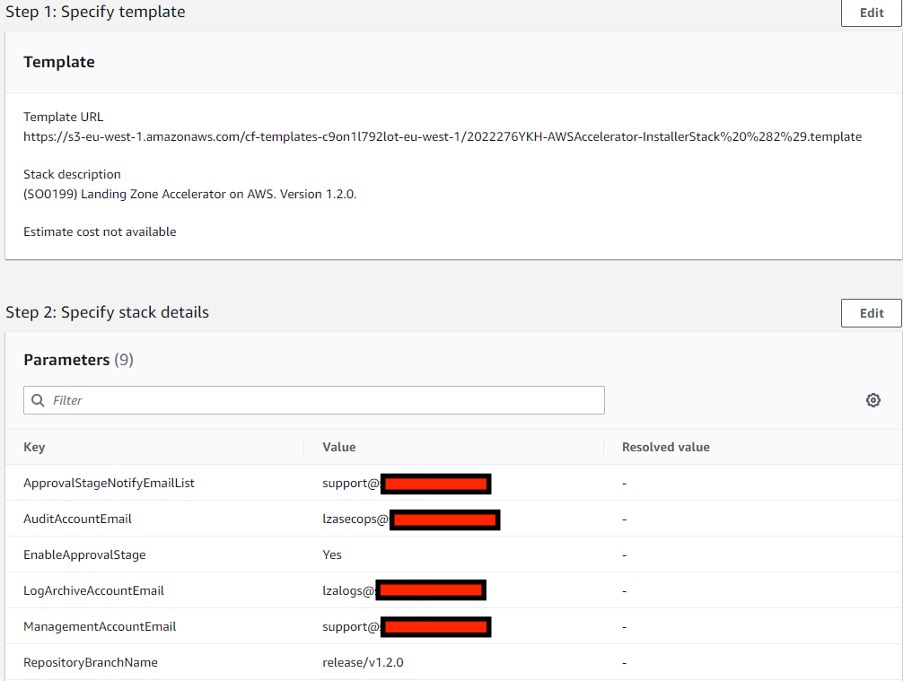
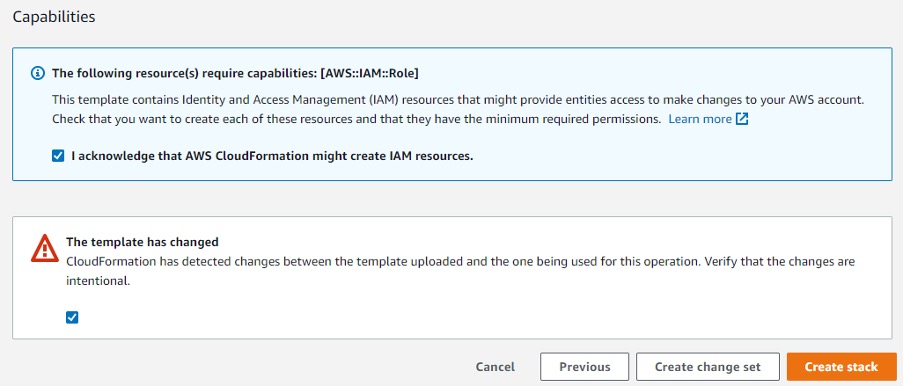
Once you are happy click on Create Stack. You may get a warning that “The template has changed”, It is ok to tick and Create stack. The stack will start deploying.
This is relatively quick deployment which will deploy the CodePipeline stack required by the Landing Zone Accelerator. Once you get a CREATE_COMPLETE you can head over to CodePipeline to see what it is deploying.

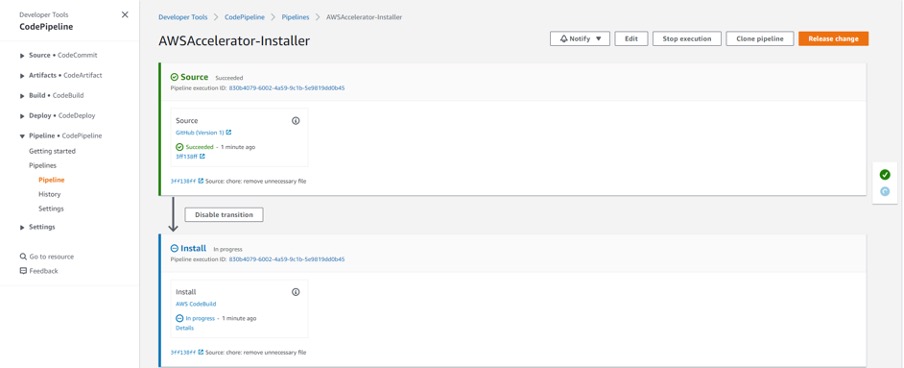
Time for another tea or coffee break as this takes up to 45 minutes to deploy completely. During this time you may notice additional CloudFormation stacks getting created. These have been triggered by the CodePipeline deployment.

Conclusion
At this stage the Landing Zone Accelerator on AWS has been deployed. In the final part of this blog series I will walk you through the various files and how you can modify them to achieve your goals. Check back in later this week or early next for the final part.
