Amazon Connect - Classify the Customer Experience
Introduction
Amazon Connect is one of the fastest growing AWS services.It is an easy to use Omnichannel Cloud Contact Centre. In the current climate it is easy to see why it is so popular. In my first blog post I discussed leveraging Speech Synthesis Markup Language within Amazon Connect to improve the customer experience. In this article I’m going to outline a feature that you can use to analyse the customer sentiment and how to get started using it within your Amazon Connect Call Centre.
Sentiment Analysis Definition
Sentiment analysis is a method for gauging opinions of individuals or groups, in communication with a call centre representative. Based on a scoring mechanism, sentiment analysis monitors conversations, in order to evaluate language, voice pitch & voice tone to quantify attitudes, opinions, and emotions related to a business, product or service. Sentiment analysis is sometimes also referred to as opinion mining. As part of the overall speech analytics system, sentiment analysis is the integral component that determines a customer’s opinions or attitudes.
How Sentiment Analysis Works
Sentiment analysis is often driven by an algorithm, scoring the words used along with voice pitch & voice tone that can indicate a callers underlying feelings about the quality of the customer experience. Sentiment analysis allows for a more objective interpretation of factors that are otherwise difficult to measure or typically measured subjectively, such as:
-
How fast the individual is speaking
-
Changes in the pitch or tone
-
The amount of stress or frustration in a caller’s voice
In call centre applications, sentiment analysis is a valuable tool for monitoring opinions and emotions among various callers such as callers interacting with a certain group of agents, during shifts, customers calling regarding a specific issue, product or service lines.
Sentiment analysis may be fully automated, based entirely on human analysis, or some combination of the two. In Amazon Connect it is fully automated using Contact Lens.
What is Contact Lens
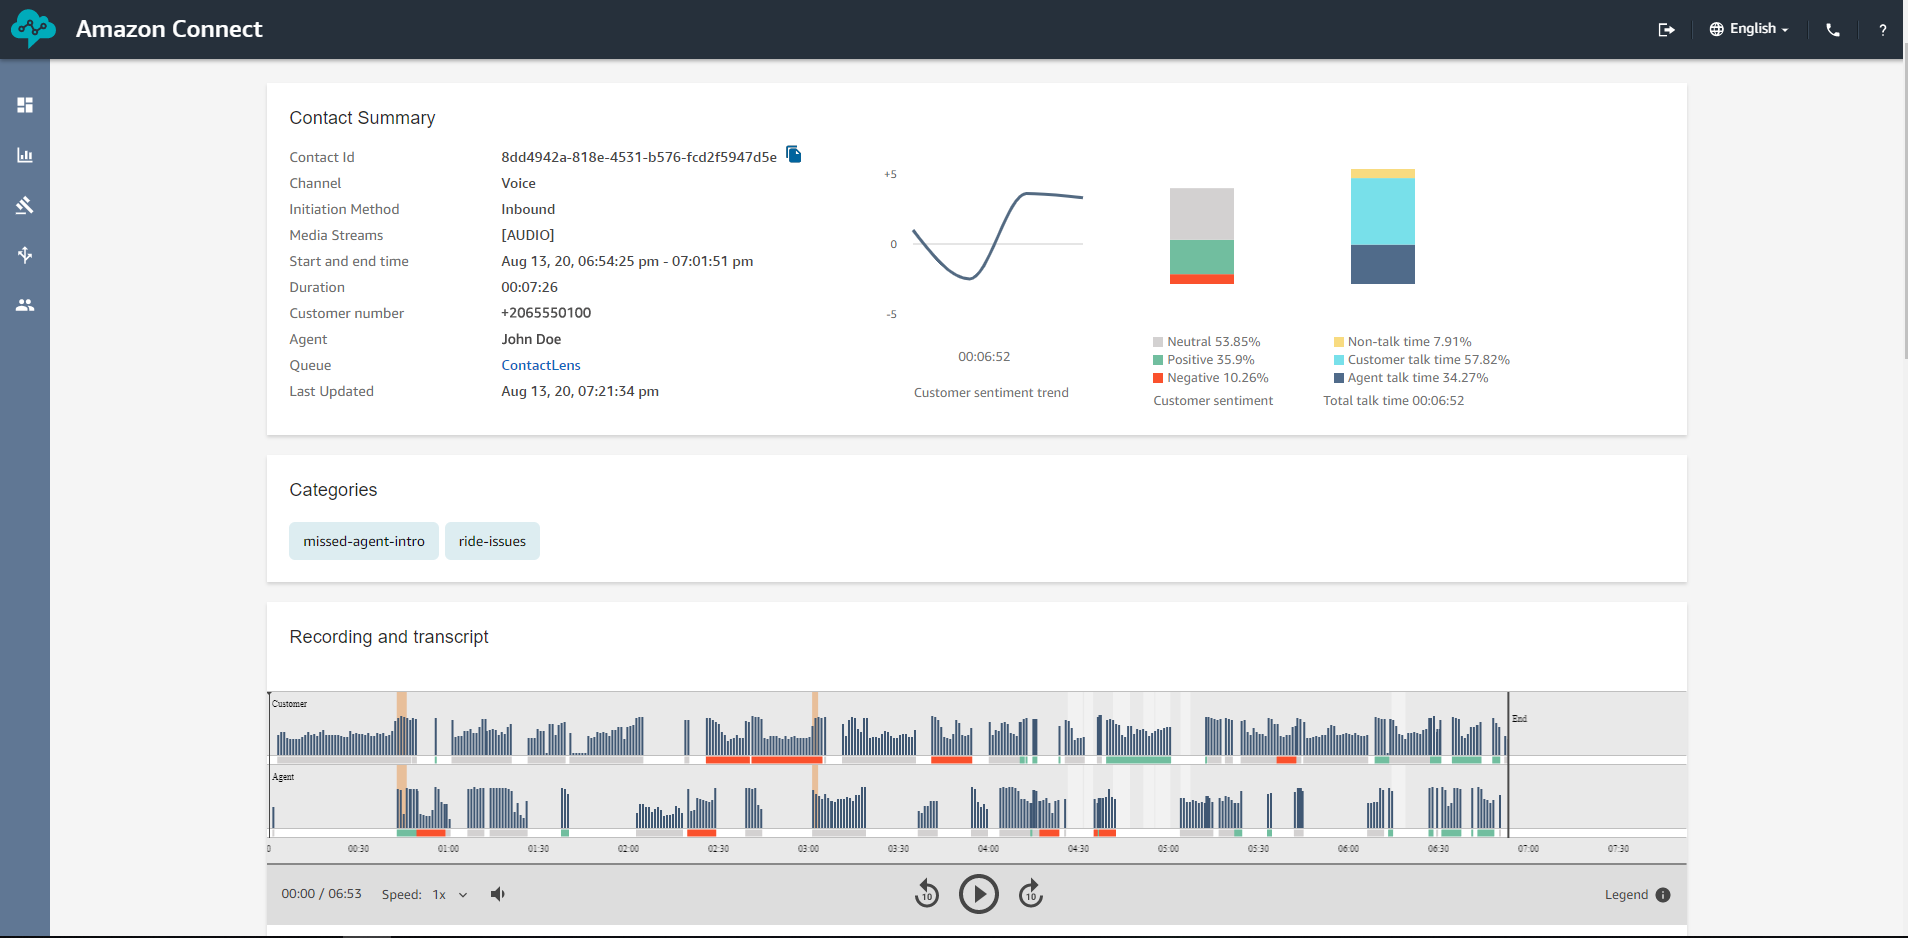
Contact Lens for Amazon Connect, a feature of Amazon Connect, enables you to better understand the sentiment and trends of customer conversations to identify crucial company and product feedback. It can also be used to track the compliance of customer conversations in Amazon Connect Contact Centre to ensure standard greetings and sign-offs are used, help train agents to replicate successful interactions. Supervisors can conduct fast full-text search on all transcripts to quickly troubleshoot customer issues. In addition, with real-time capabilities, you can get alerted to issues during live customer calls and can deliver proactive assistance to agents while calls are in progress, improving customer satisfaction.
Enabling Contact Lens
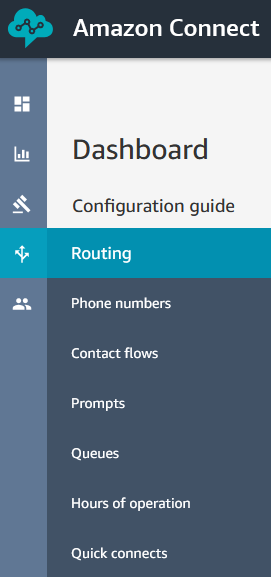
To get started you need to login into the Amazon Connect Service. From the Options on the left you will want to select Routing and the Contact Flows.
In the right of the screen we click on the Create contact flow button.

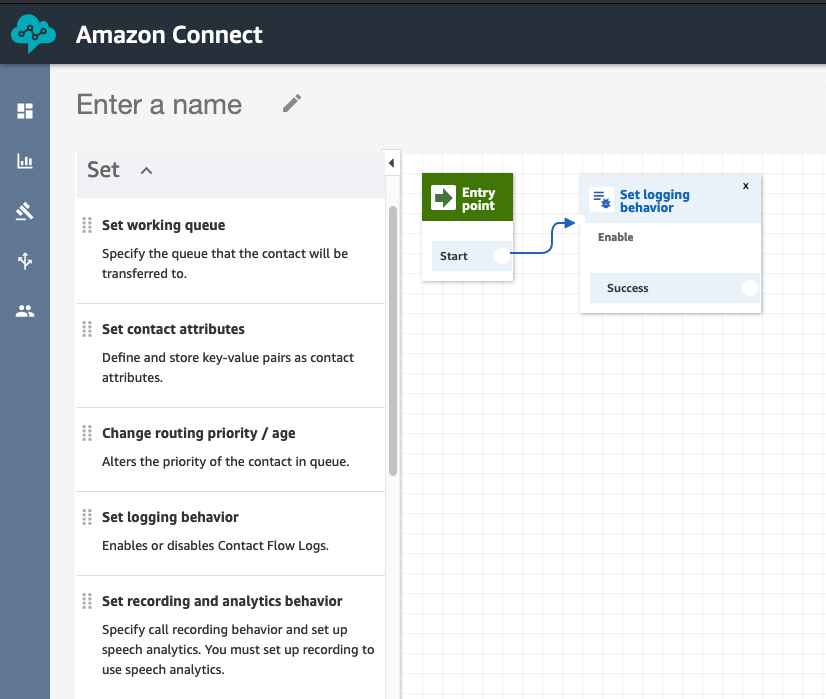
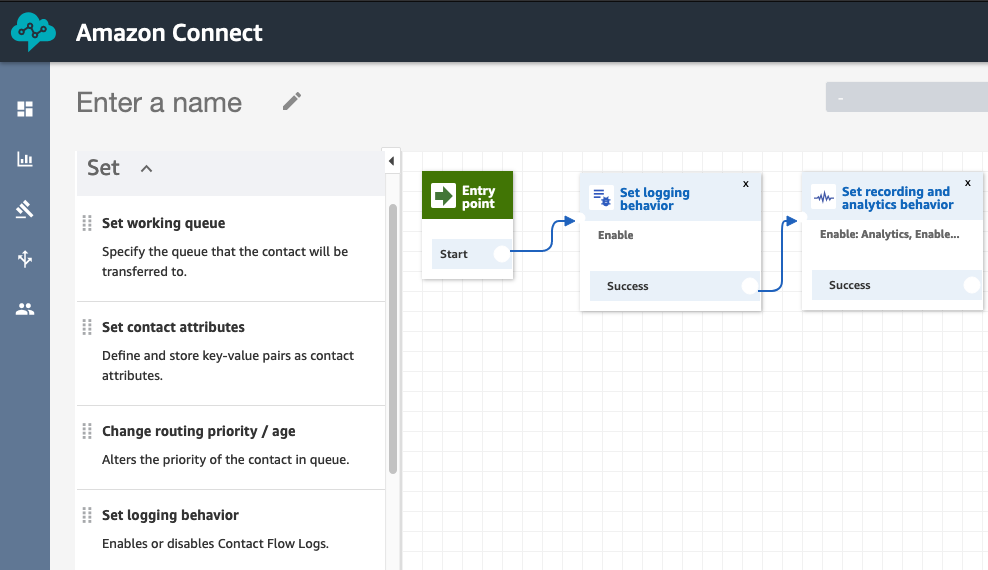
Our blank Contact Flow appears with the Entry Point block already added. You enable Contact Lens using the “Set recording and analytics behavior” Block. This can be found by expanding the Set Options on the left. A recommended best practice is to enable logging first by using the “Set logging behavior”. With this enabled Connect will write logs out to CloudWatch logs. This can be useful for troubleshooting down the line. If you do enable logging then ensure you go to CloudWatch logs and set the retention to 30, 60 or 90 days otherwise your logs will be stored forever.
Drag the “Set logging behavior” block onto the canvas using the cursor. Hover over the Start block to implement the connector between the Entry point and Set logging behavior block.
Now drag the “Set recording and analytics behavior” block onto the canvas using the cursor. Hover over the Set logging behavior block to implement the connector between the Success point and the Set recording and analytics behavior block.
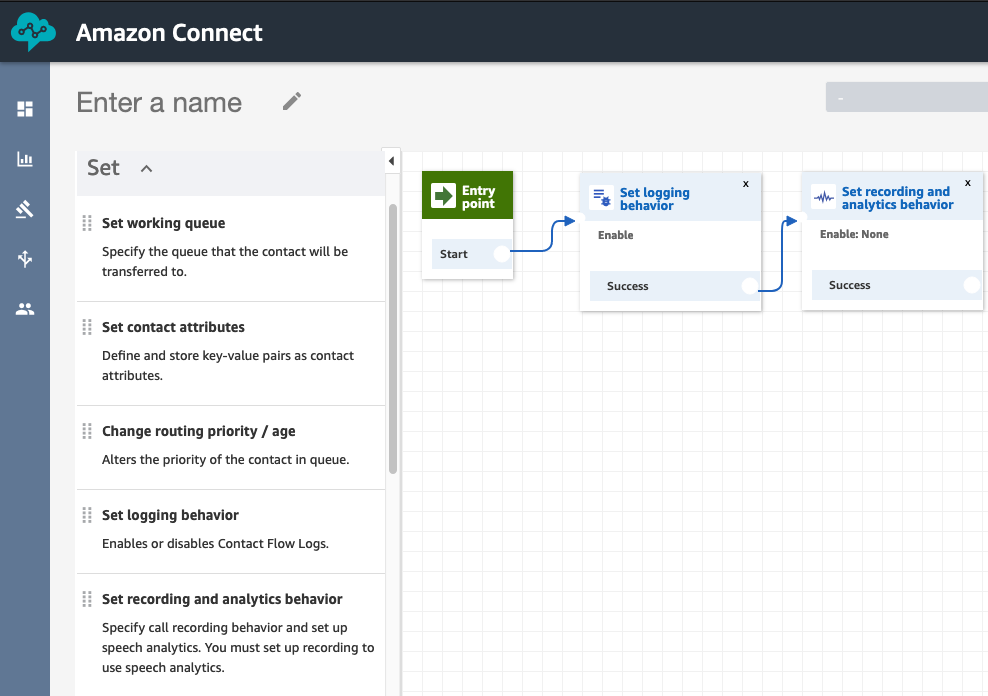
By clicking on the Set recording and analytics behavior you can turn on Contact Lens to be used throughout the flow. N.B Contact Lens needs to be enabled on all flows to capture entire caller interaction. Call recording for agent and customer need to be turned on for Contact Lens to work.
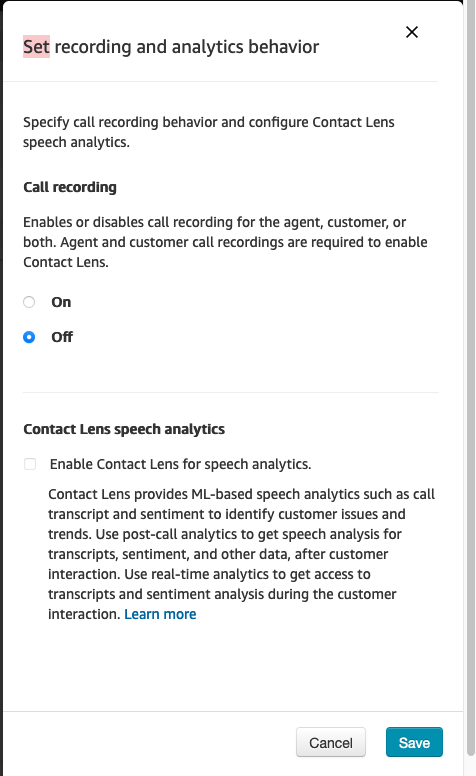
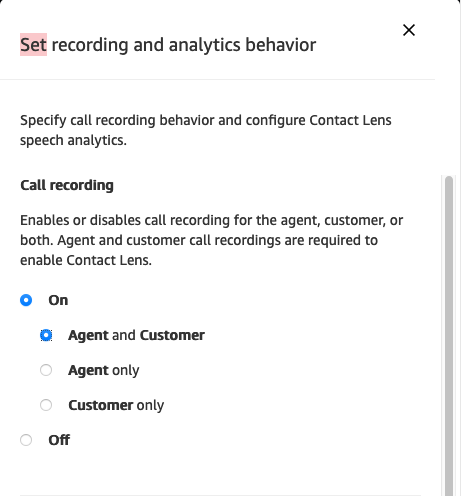
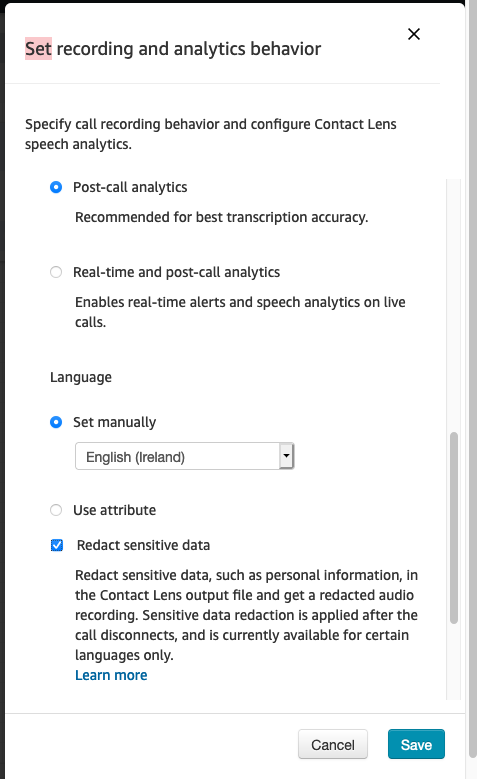
Click the tick box to enable Contact Lens and then choose between Post-call analytics or Real-time and post-call analytics. For the purposes of this post we are just going to enable the Post-call analytics. Recommendation on language is to set to your closest locale. Finally you have the option of Redact sensititive data. Click Save to complete the configuration.
Once you have enabled logging and Contact Lens, should see similar to the below image.
Complete The Call Flow
In order to test Contact Lens you need to add “Set Working Queue”, “Transfer to Queue” and “Disconnect” blocks to your flow. For testing purposes you can choose the “BasicQueue”. In the top left of your flow, you will want to name the flow. You cannot save or publish the flow unless you have given it a name. If you follow the steps, you will have something similar to below.
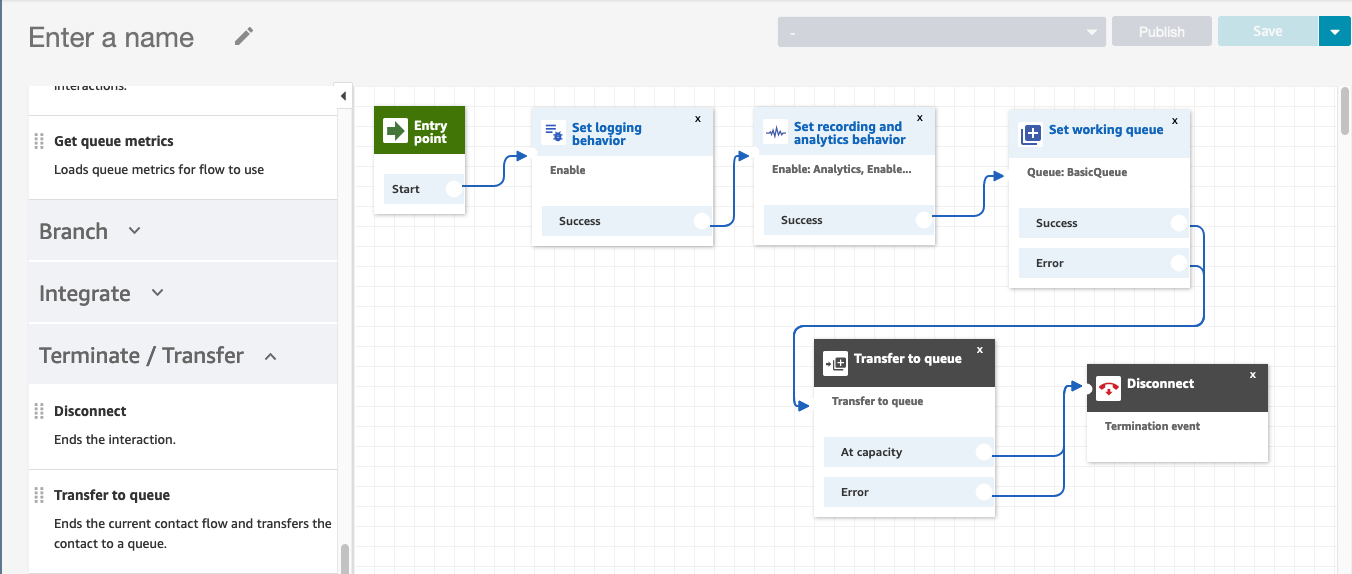
You will need to assign either a toll-free or DID (Direct Inward Dialing) telephone number to your Contact Lens Test Flow in order to see the output. Please ensure that you release the number once you are finished testing otherwise you will continue to incur charges. This is an example of a very simple call flow to show how you can test Contact Lens in your environment. The next section covers how to setup rules to categorise your calls.
Create Rules
For Contact Lens, you can create rules to automatically categorise contacts based on uttered keywords and phrases.These are not required for Contact Lens to work but do help filter calls or identify trends in certain calls. If you enable real-time analytics, you can add rules that automatically alert supervisors when a customer experience issue occurs. From the Options on the left you will want to select Rules.
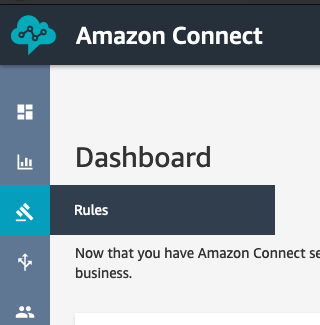
In the right of the screen we click on the Rules button and select Contact Lens.

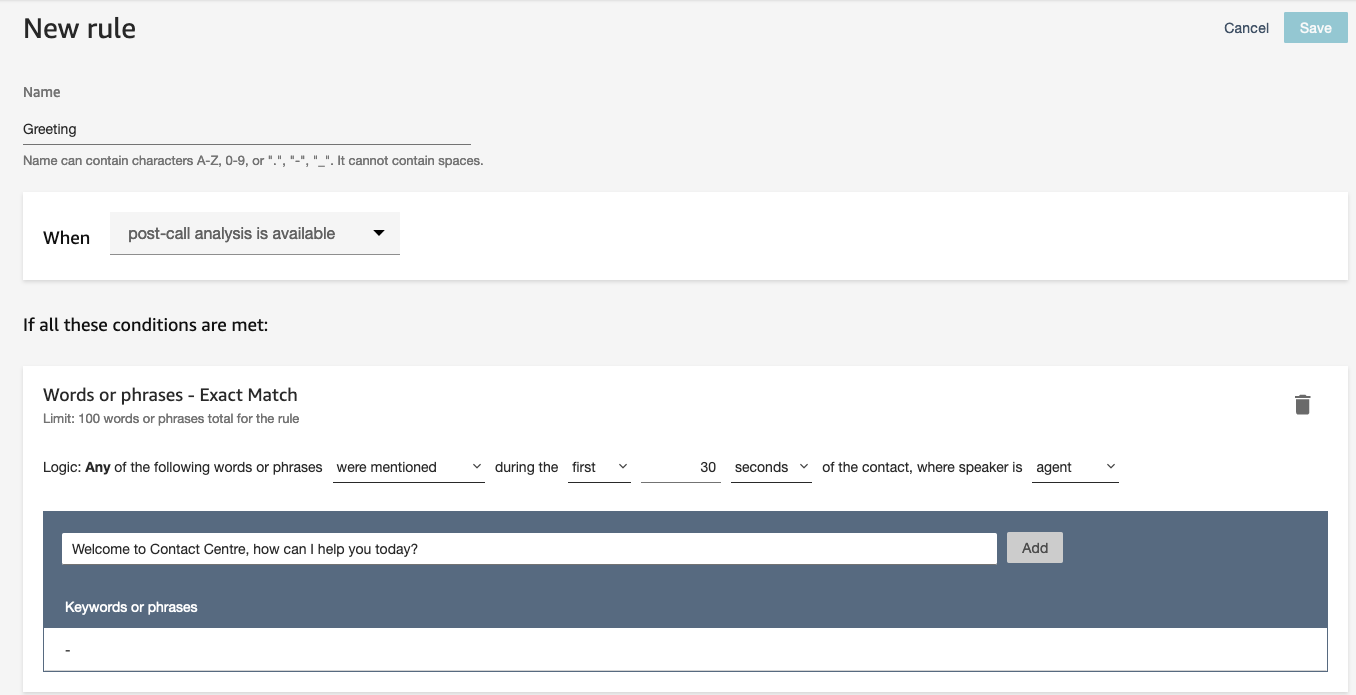
Name the rule and add the conditions you want to match on for the rule. I’m going to create a rule called Greeting and I’m going to check that the agent greets the caller within first 30 seconds of the call. Click on Add once you have defined the phrase that want to check for. If there are other possible ways to greet caller then these can be added as well. Once a keyword or phrase has been added want to click on Save in the top right.
Reviewing the Contact Trace Record and Contact Lens Output
Make a call to the toll-free or DID (Direct Inward Dialing) telephone number assigned to your instance. Ideally you will need two people for this part, one to make the call and the other to be the agent. The conversation should last at least 1 minute. Please ensure that you release the number once you are finished testing otherwise you will continue to incur charges. As a guide in production environment it normally takes Contact Lens the duration of the call to complete the analysis. If a call is 5 minutes long it will take approx 5 minutes to complete the output.
From the Options on the left you will want to select Metrics and Quality then Contact Search.
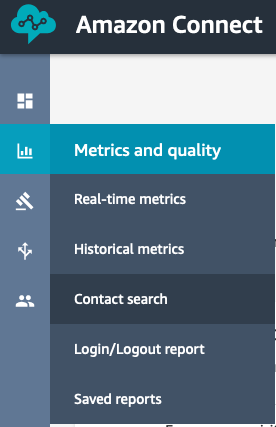
You can now review the entire call and chat transcript, with customer and agent sentiment for every speaker turn.
-
Once you define rules for areas of particular interest (like mention of a competitor or specific scripts that agents are expected to say every time they talk to a customer), you can also see those here and filter results based on these categories.
-
New graphs are also available to see the change of sentiment throughout an interaction. For example, was a customer upset but turned around by the agent during the interaction? What percentage of the contact was silent?
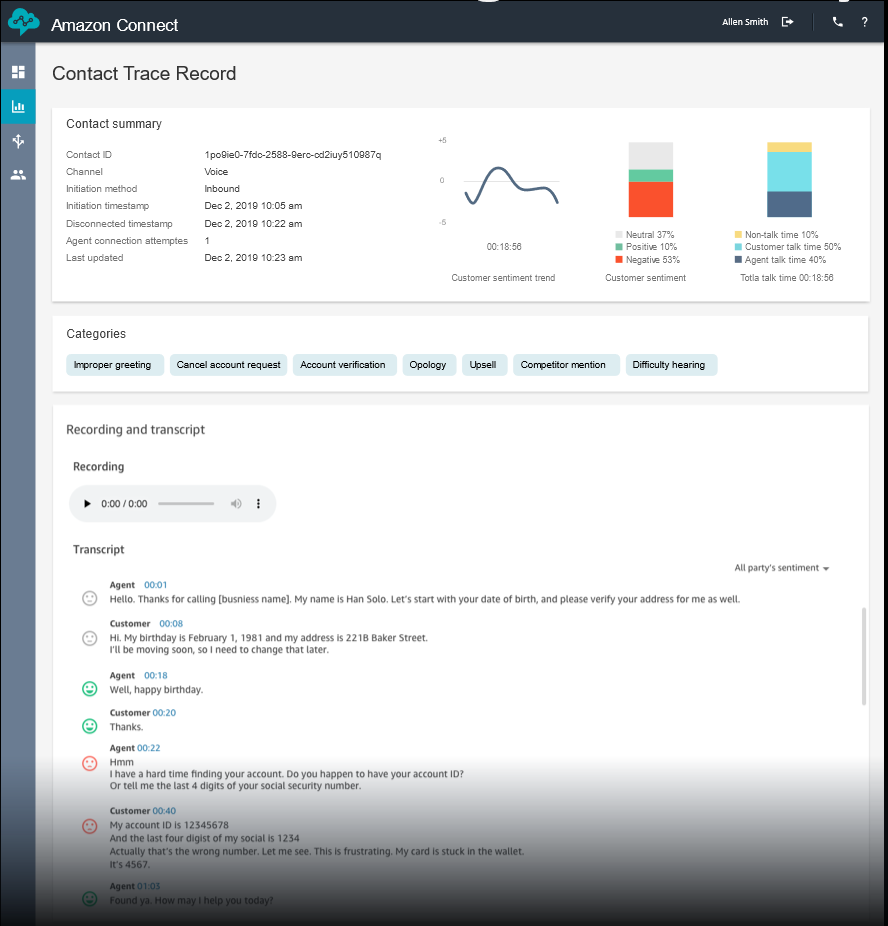
Your Call Centre Supervisors and Quality Control staff can use the Amazon Connect console to track compliance. As the Contact Lens output is a json file that resides in a S3 bucket that you can control, it is possible to visualise in Quicksight. That is a post for another day. Another option is to stream the Contact Lens output to Salesforce to attach to case record.
Conclusion
Prior to availability of Contact Lens an enterprise could expect that their Quality Control staff would be able to listen to approx 1 to 2 calls per agent per month. Contact Lens now allows enterprises to track all calls without much effort, investment or specialist machine learning staff to identify both positive and negative trends emerging in the Contact Centre. Using the Contact Lens output the Quality Control staff can concentrate on working to eradicate the negative interactions through improvements in training or business processes. The end goal is always improving the customer experience so they come back in the future or talk about the enterprise in a positive manner. I will explore other features of Amazon Connect in subsequent posts that help create positive customer experiences.
