Amazon Connect - Develop First Chatbot and use within Connect
Introduction
Amazon Connect is one of the fastest growing AWS services. It is an easy to use Omnichannel Cloud Contact Centre. In the current climate it is easy to see why it is so popular. In my previous blog posts I discussed leveraging services within Amazon Connect to improve the customer experience. In this article I’m going to show you how to create a chatbot using Amazon Lex to capture customer name and then use within your Amazon Connect Call Centre.
Amazon Lex
Amazon Lex is a service for building conversational interfaces using voice and text. It is powered by the same conversational engine as Alexa. Amazon Lex provides high quality speech recognition and language understanding capabilities, enabling addition of sophisticated, natural language ‘chatbots’ to new and existing applications. Lex reduces multi-platform development effort, allowing developers to easily publish speech or text chatbots to mobile devices and multiple chat services. It has native interoperability with AWS Lambda and Amazon CloudWatch alongside easy integration with many other services on the AWS platform including DynamoDB.
Amazon Connect Integration
Amazon Lex is natively integrated within contact flows, routing, and chat allowing you to service customers directly. There is no coding required to add Natural Language Understanding (NLU) powered chatbots. The context of the conversations is passed automatically when escalated to a human agent. Amazon Connect chat supports asynchronous messaging, enabling you to give your customers and agents the ability to message without being available at the same time.
Creating a Simple Bot
To get started you need to login into the AWS Management Console and select the Lex service. This can be found under Machine Learning. Later I will be using Connect in Frankfurt (EU-CENTRAL-1) so I’m going to deploy my Lex bot in Frankfurt as well. With the recent upgrades to Connect UI it is no longer important that both are in same region as can select the region when whitelisting within Connect.

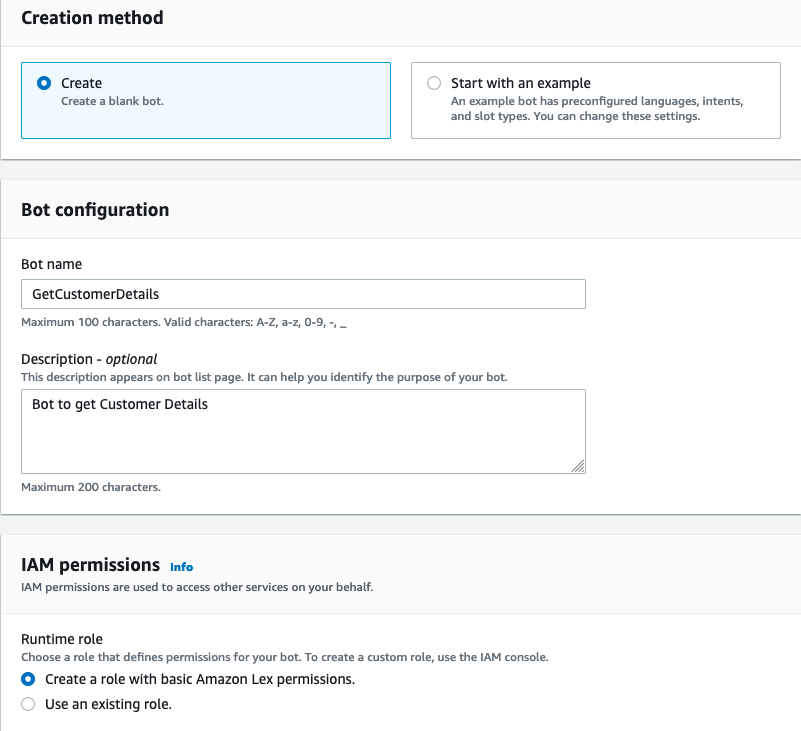
Once the Lex console opens we want to click on Create Bot on the right hand side.

Next will provide a unique name and description for the Bot. After that we want IAM to create the necessary role to allow the Bot to run successfully.
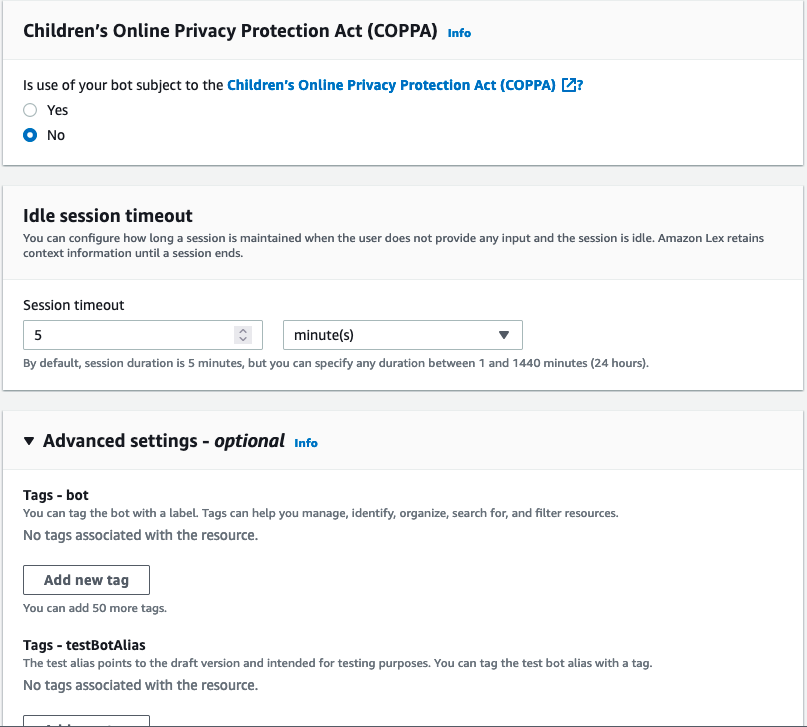
Our bot is not intended to be used by children so will select “No” for COPPA requirements. Add any tags that you may require to identify your bot at later date. For now I’m going to leave my tags blank.
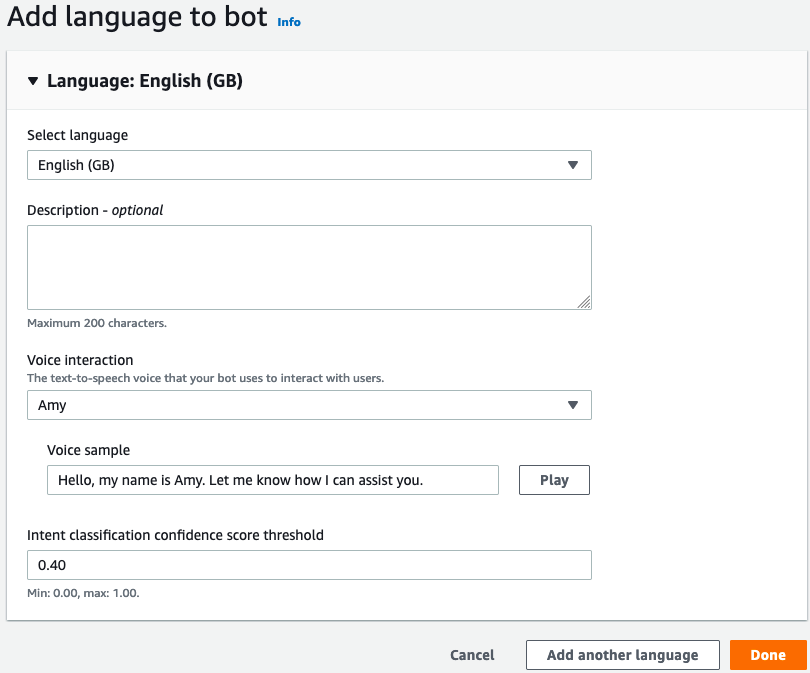
Finally we want to add any additional languages and voices that we want to support with our Bot. The last step is to click done.
Configuring our Simple Bot to capture Customer name
Now that we have created out Bot it is time to add intents, slots and utterances so that we can capture our customer’s first name.
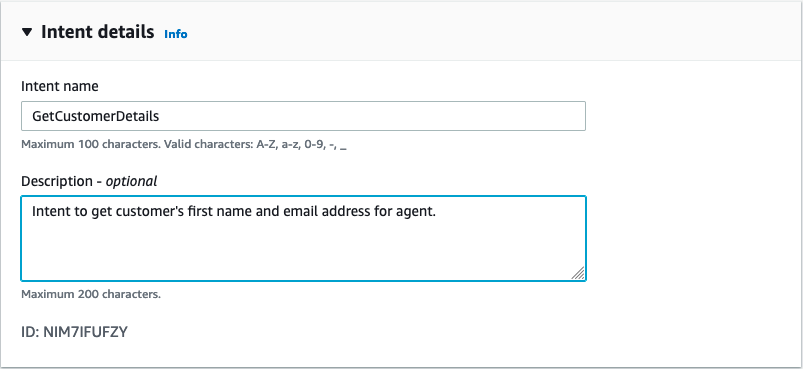
The first step is to name our intent. It is best to give this a unique name just in case you want to reuse the intent in another bot.
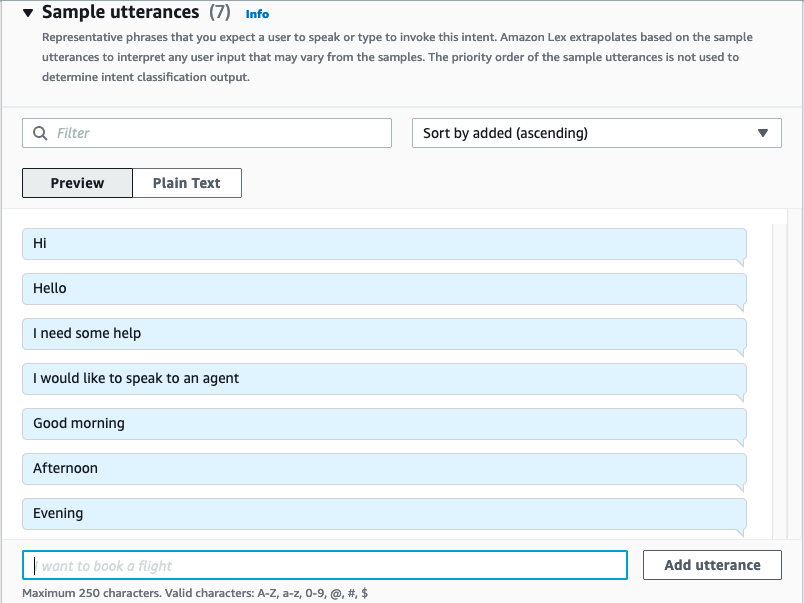
Next we add our sample utterances to the intent. Sample utterances are words or phrases that an intent associated with the bot will listen for. If the intent matches any of the words or phrases then that will start the fulfilment process.
In order to capture the name we need to use Slots. Amazon Lex supports built-in slot types that define how data in the slot is recognized and handled. Any slots that are Amazon.SlotName are built-in slot types that Lex knows about already. We add a slot for each piece of data we want to get from the customer. Lex will not proceed to transfer to agent until such time as all slots contain a value.
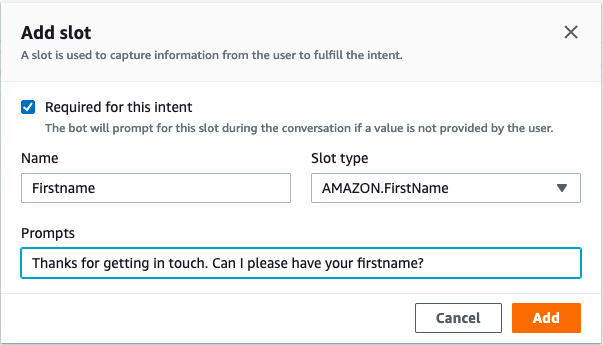
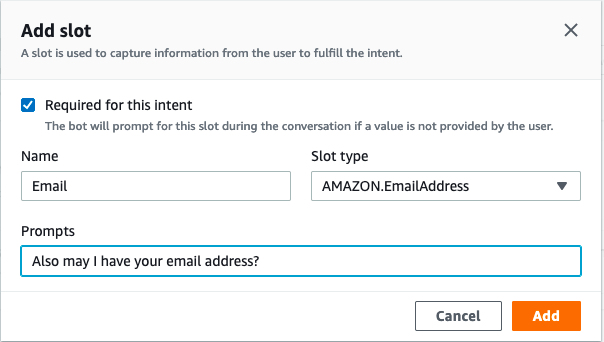
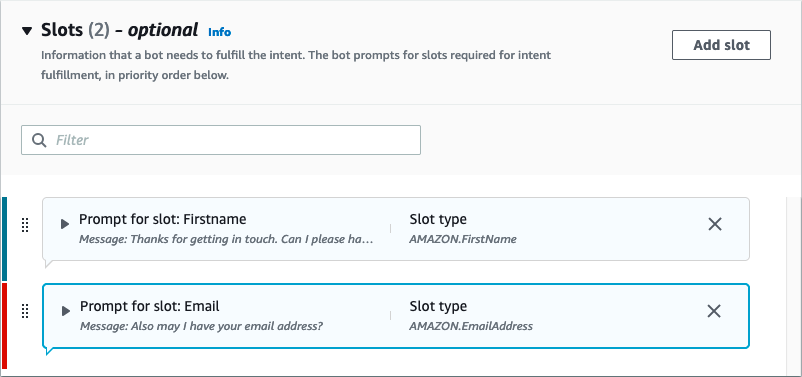
Now that we have our slots we just need to add our closing response that informs the customer that the intent has been fulfilled.
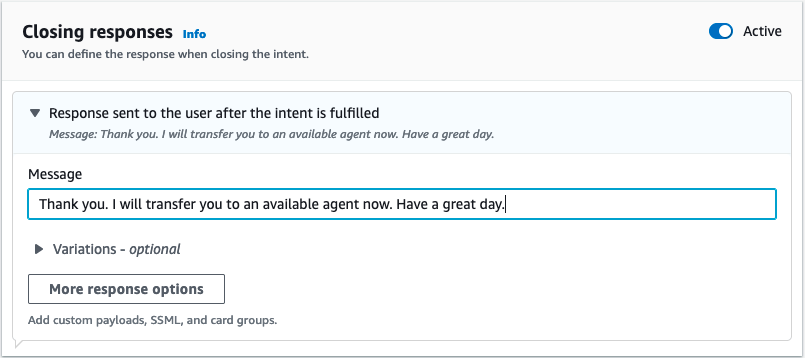
All that remains is to save the intent and build the bot. This can be found at bottom of page.

Once the bot has been built we can test it by clicking on the Test button.
Whitelist Lex Bot for use in Amazon Connect
Now that the Lex bot has been built it needs to be whitelisted for use with Amazon Connect. From the AWS Management Console go to Amazon Connect service. Select the Connect instance that you want to add the bot too. Next select Contact Flows under the instance
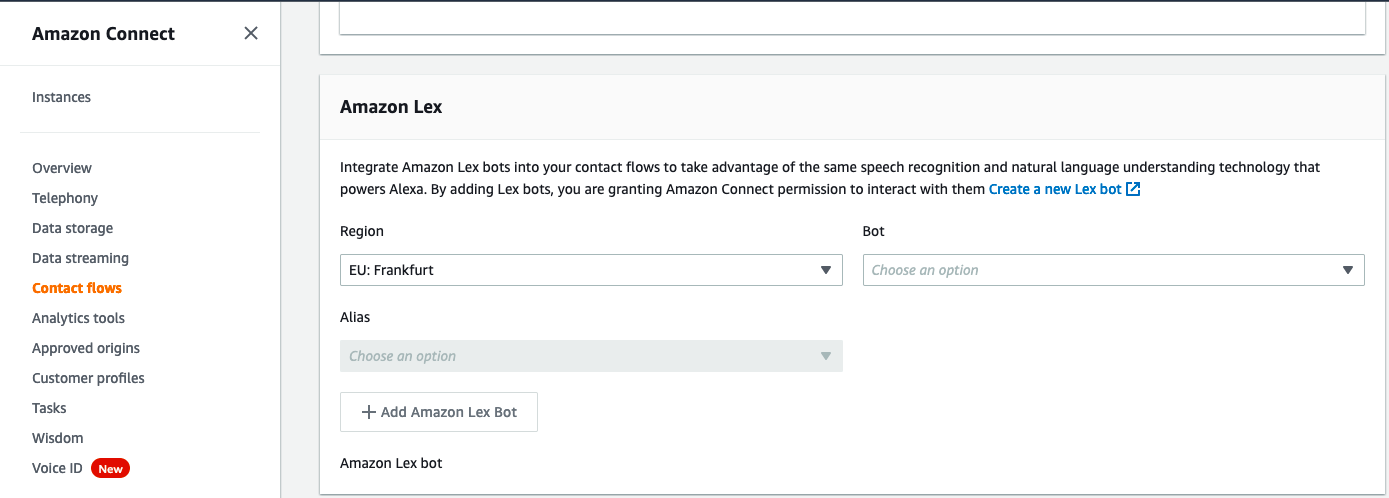
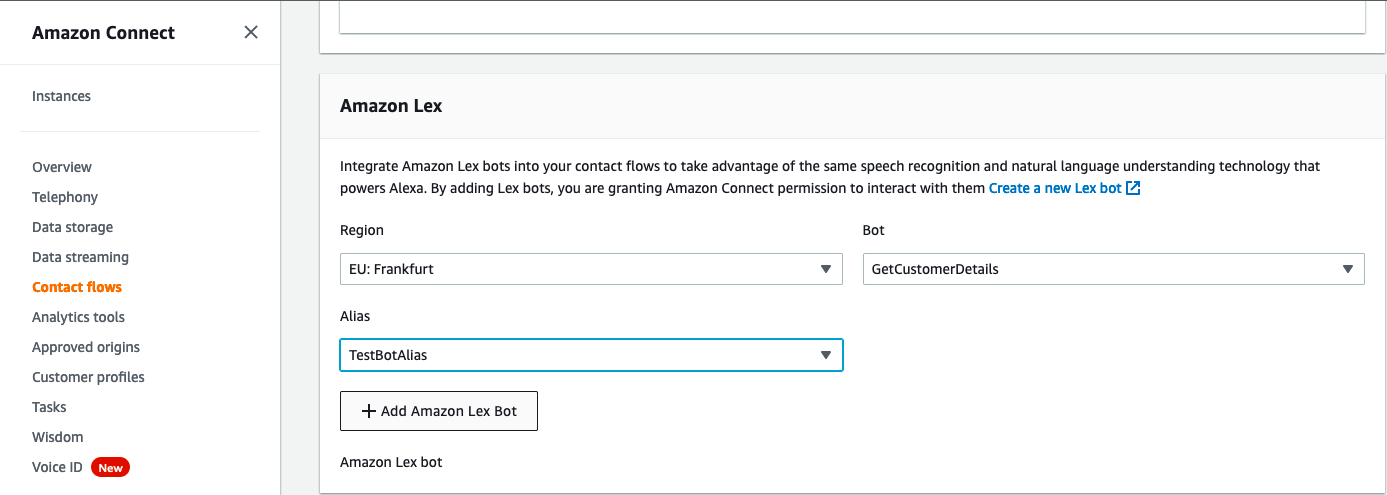
Select your Bot from the drop down and the relevant alias. Then click Add Amazon Lex Bot. Note a bot can have multiple aliases.
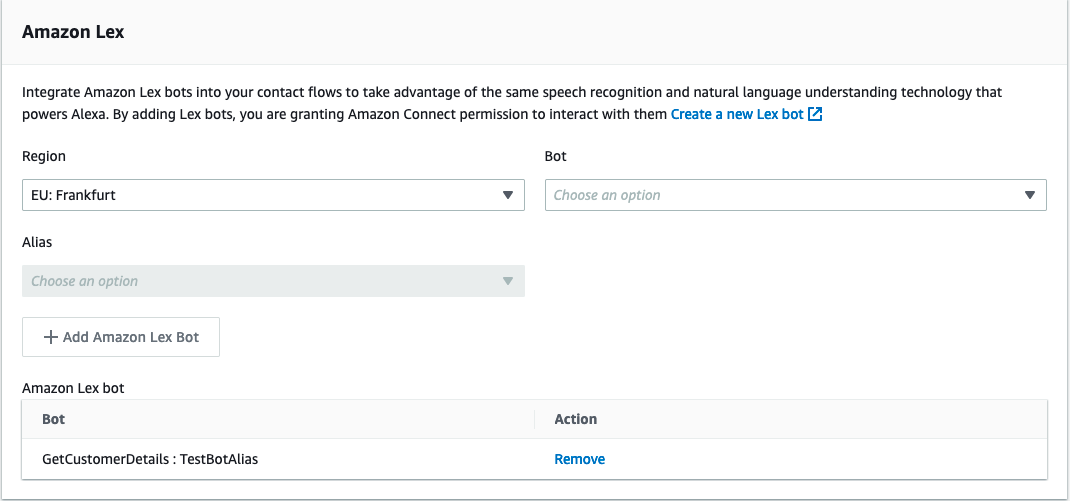
If you have added it correctly it should look similar to below.
Amazon Connect Call Flows
To get started you need to login into the Amazon Connect Service. From the Options on the left you will want to select Routing and the Contact Flows.
In the right of the screen we click on the Create contact flow button.

Our blank Contact Flow appears with the Entry Point block already added. You enable Contact Lens using the “Set recording and analytics behavior” Block. This can be found by expanding the Set Options on the left. A recommended best practice is to enable logging first by using the “Set logging behavior”. With this enabled Connect will write logs out to CloudWatch logs. This can be useful for troubleshooting down the line. If you do enable logging then ensure you go to CloudWatch logs and set the retention to 30, 60 or 90 days otherwise your logs will be stored forever.
Drag the “Set logging behavior” block onto the canvas using the cursor. Hover over the Start block to implement the connector between the Entry point and Set logging behavior block.

Now drag the “Set recording and analytics behavior” block onto the canvas using the cursor. Hover over the Set logging behavior block to implement the connector between the Success point and the Set recording and analytics behavior block.
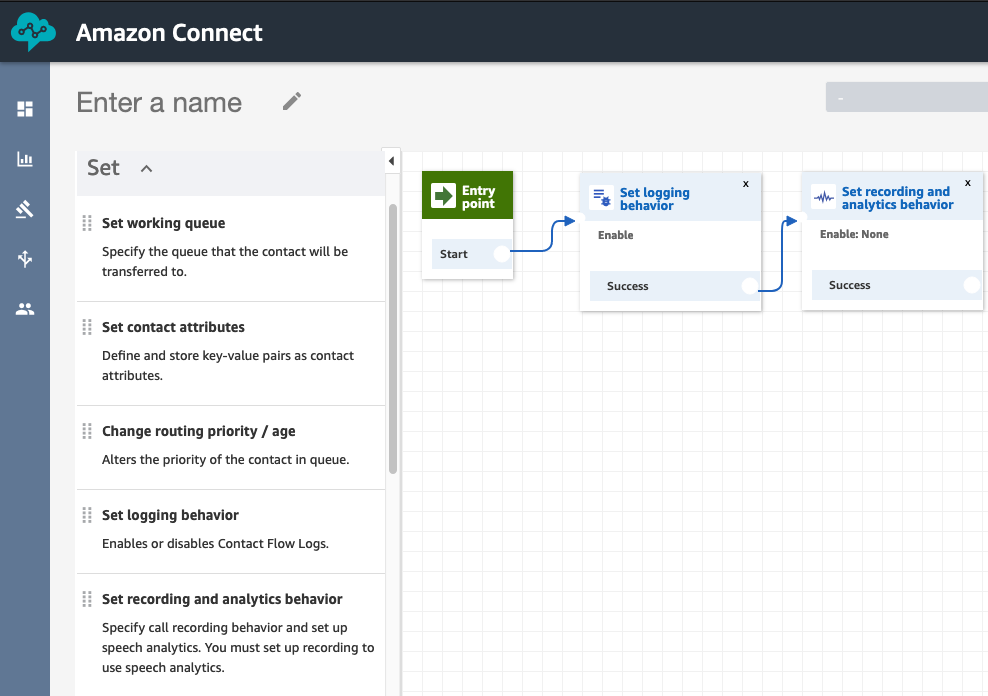
By clicking on the Set recording and analytics behavior you can turn on Contact Lens to be used throughout the flow. N.B Contact Lens needs to be enabled on all flows to capture entire caller interaction. Call recording for agent and customer need to be turned on for Contact Lens to work.


Click the tick box to enable Contact Lens and then choose between Post-call analytics or Real-time and post-call analytics. For the purposes of this post we are just going to enable the Post-call analytics. Recommendation on language is to set to your closest locale. Finally you have the option of Redact sensititive data. Click Save to complete the configuration.

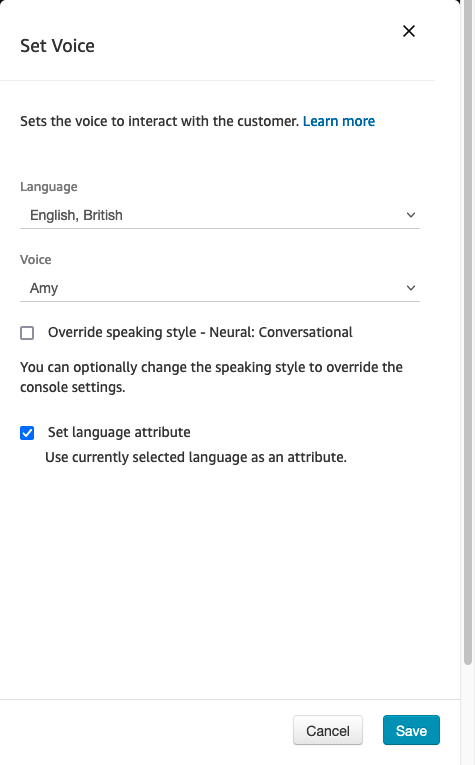
As we are using an Amazon Lex v2 bot, the language attribute in Amazon Connect must match the language model used to build your Lex bot. This is different than Amazon Lex (Classic). Use a Set voice block to indicate the Amazon Connect language model that should be used. If they don’t match then Connect will not be able to use the bot.
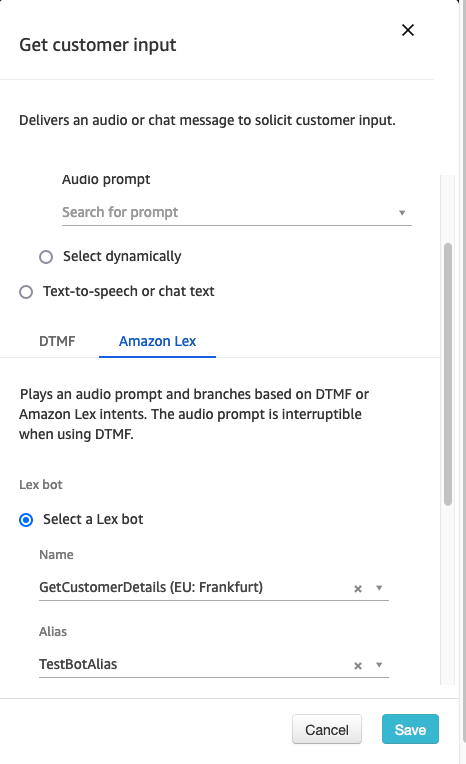
Next we add a Get Customer Input block, were we select our bot and alias.
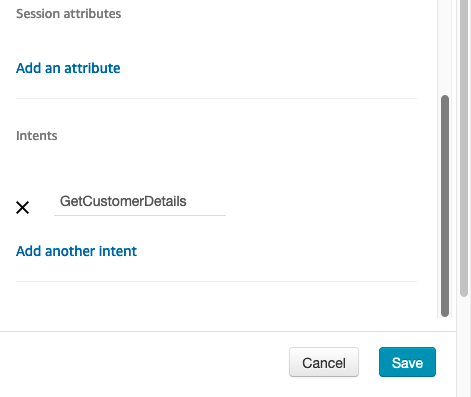
Also need to add any intents we want to use with the bot.
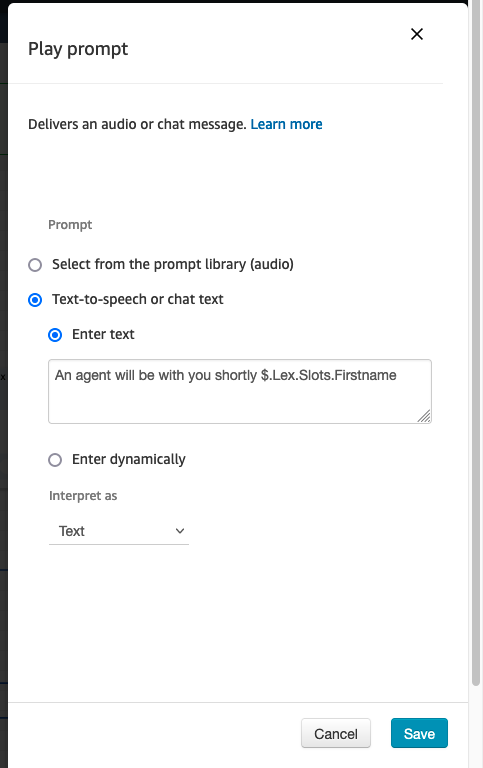
We are going to add a Play prompt with a message back to the caller but will address them by name. To do this we reference the Lex slot in the Play prompt $.Lex.Slots.SlotName. Replace the SlotName with the name of your slot. Note the SlotName is case sensitive.
Complete The Call Flow
In order to test you need to add “Set Working Queue”, “Transfer to Queue” and “Disconnect” blocks to your flow. For testing purposes you can choose the “BasicQueue”. In the top left of your flow, you will want to name the flow. You cannot save or publish the flow unless you have given it a name. If you follow the steps, you will have something similar to below.
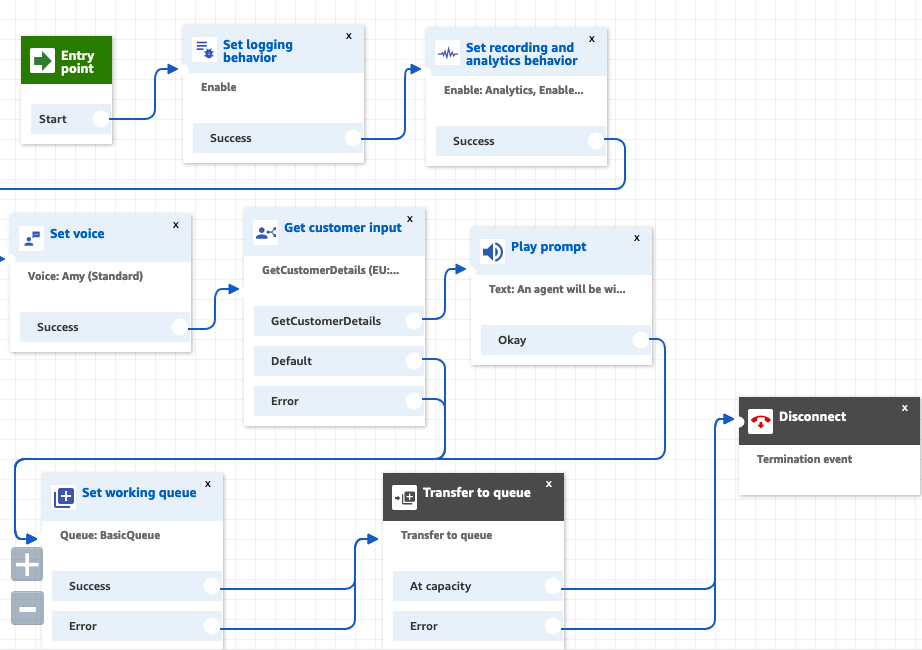
You will need to assign either a toll-free or DID (Direct Inward Dialing) telephone number to your Test Flow in order to test. Please ensure that you release the number once you are finished testing otherwise you will continue to incur charges. This is an example of a very simple call flow to show how you can test Contact Lens in your environment. The next section covers how to setup rules to categorise your calls.
As our bot can also be used as a text bot, you can use the Test Chat function from the Connect Dashboard.

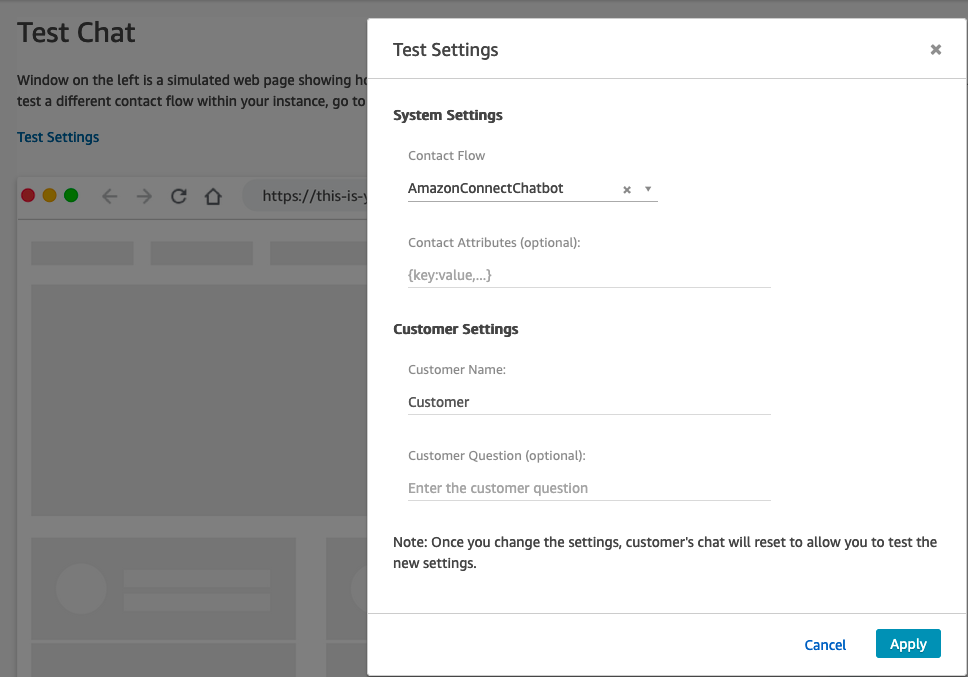
In the settings select the Chatbot contact flow.
Now you can test the bot
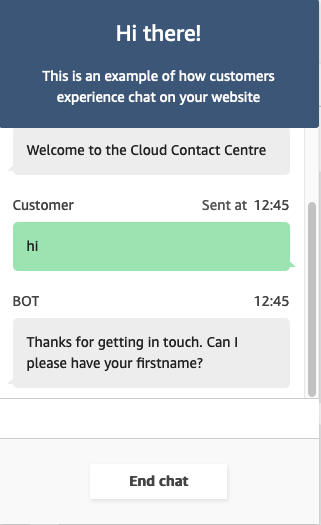
You can read more about adding Amazon Connect Chat to your website at the Amazon Connect Github
Conclusion
The end goal is always improving the customer experience so they come back in the future. By leveraging bots we are releasing our human agents from low value work to higher value work that will help with customer retention and positivity towards the enterprise. In my previous post I showed you how to enable Contact Lens. Using the output from Contact Lens, your Quality review team should be able to identify infrequent or slow processes that would be ideal for your first bot. As you gain more experience with Lex, in the future you should be looking to combine with other AWS services such as Kendra or other AI and machine learning services to turn your bot into a fully functioning virtual assistant. Stay tuned for future blog posts.
Recent Amazon Connect Announcements
*Amazon Connect Voice ID Now Generally Available
*Amazon Connect Wisdom Now Generally Available
*Amazon Connect High Volume Outbound Communication Preview Available
